Installing you vEdit file editor to a USB flash drive is a great option when using the software on multiple machines or even on the go.
Contents
Quick USB Drive Install
This is guide will show you how to install vEdit to Quickly to a USB drive.
1. Connect the drive you plan to install vEdit on (example: 16GB USB Drive).
2. Download your vEdit .exe file and execute it. (example: vpa-prod.exe)
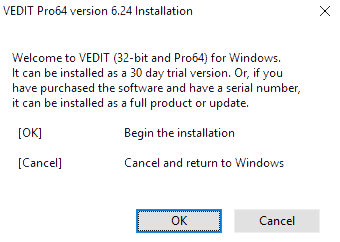
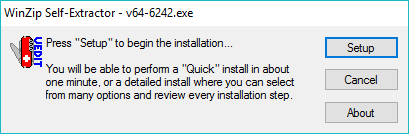
3. Executing the .exe will your first prompt, "Welcome to vEdit...". Click Ok to begin the installation.
4. Self-Extractor, Click Setup to continue.

5. Select Install

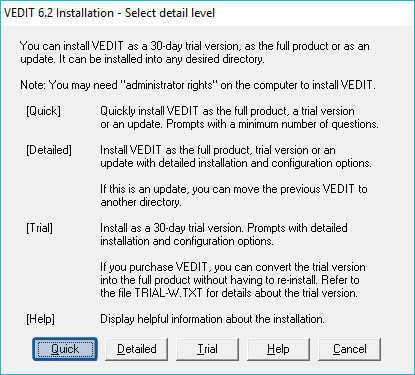
6. Select Quick
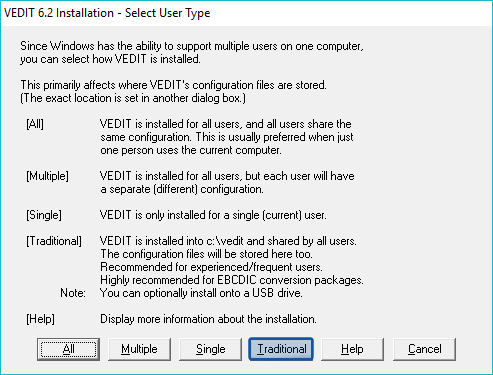
7. Select Traditional

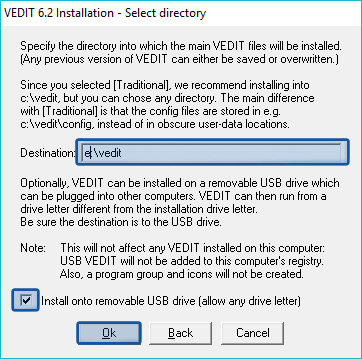
8. Select directory, change the Destination: to the location of your USB installation folder (example: e:\vedit). Once the destination has been updated, check Install on removable USB drive (allow any driver letter). This option allows vEdit to work correctly when changing from computer to computer or even just changing drive letters, once complete click Ok
9. Change the User Directory: to the USB installation folder (example: e:\vedit). Click Ok.

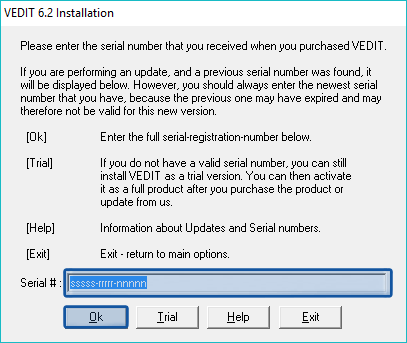
10. Enter your Serial # and then click Ok or Select Trial.
11. Verify your information is correct and then click Continue.

12. Continue through a few prompts and then Exit the installation.
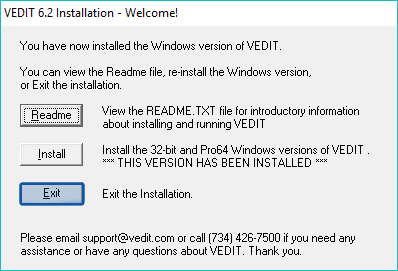
13. vEdit is now installed and ready to use off your flash drive.
Detailed USB Drive Installation
This is in depth guide will show you how to install vEdit to a USB drive in detail from start to finish.
1. Connect the drive you plan to install vEdit on (example: 16GB USB Drive).
2. Download your vEdit .exe file and execute it. (example: vpa-prod.exe)
3. Executing the .exe will your first prompt, "Welcome to vEdit...". Click Ok to begin the installation.
4. Click Setup to proceed with installation.
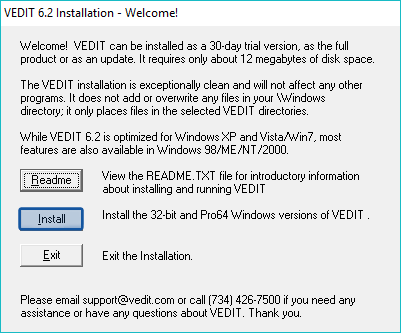
5. The "Installation - Welcome!" prompt offers a README.TXT file prior to starting the process in case you would like to read it first, to continue click Install
6.When normally installing vEdit there is multiple installation options, but for this USB drive installs we will select Detailed.

7. Select user type, click Traditional
8. Select directory, change the Destination: to the location of your USB installation folder (example: e:\vedit). Once the destination has been updated, check Install on removable USB drive (allow any driver letter). This option allows vEdit to work correctly when changing from computer to computer or even just changing drive letters, once complete click Ok
9. Change the User Directory: to the USB installation folder (example: e:\vedit). Click Ok.
10. Enter your Serial # : and click Ok or select Trial.

11. You may upload an existing keyboard layout (follow prompt instructions based on your previous version), but if this your first installation of vEdit select No (No was selected for this guide).

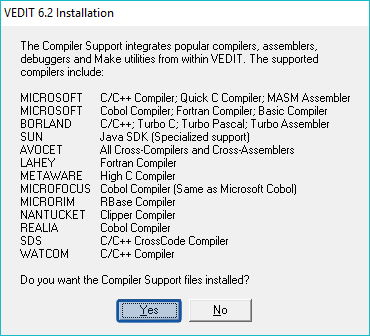
12. The Compiler Support integrates popular compilers, assemblers, debuggers and Make utilities from within vEdit.
Supported Compilers Include:
- Microsoft
- C/C++ Compiler, Quick C Compiler, MASM Assembler, Cobol Compiler, Fortran Compiler, Basic Compiler
- Borland
- C/C++, Turbo C, Turbo Pascal, Turbo Assembler
- Sun
- Java SDK (Specialized Support)
- Avocet
- All Cross-Compilers, Cross-Assemblers
- Lahey
- Fortran Compiler
- Metawave
- High C Compiler
- Microfocus
- Cobol Compiler (Same as Microsoft Cobol)
- Microrim
- RBase Compiler
- Nantucket
- Clipper Compiler
- Realia
- Cobol Compiler
- SDS
- C/C++ CrossCode Compiler
- Watcom
- C/C++ Compiler
To install Compiler Support Files click Yes.
13. To install the EBCDIC conversion package trial click Yes

14. To have the vEdit .PDF manuals included with the install click Yes, if not select No

15. Make sure all your information, Source directory and Destination directory, is correct. If everything is correct select Continue.

16. Normally it is recommend to install vEdit into the windows "Registry" but for USB Drive installs we suggest selecting Skip.

17. All vEdit files are now installed! The next few steps are needed to configure the program to your preference, click Ok.

18. Select Normal (recommended) for your keyboard layout.
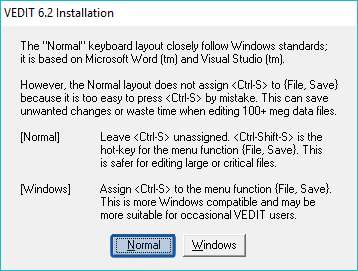
19. Select Normal or Windows layout setting.
- Normal
- The "Normal" keyboard layout closely follows Windows standards, except for a few settings. Ctrl-S does not save, instead it is Ctrl-Shift-S to save a file. This prevents mistakenly saving while editing large files.
- Windows
- Assigns Ctrl-S to save the file
20. Select a color scheme, this can be changed in your preferences at anytime. Once complete click Ok.

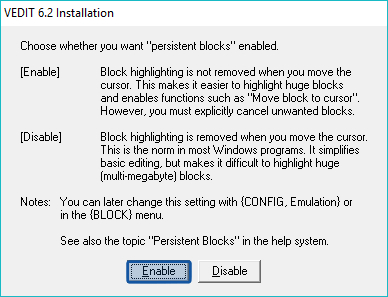
21. Select whether you want Persistent Blocks enabled, this option can be changed at anytime via your Configuration options.
- Enable
- Block highlighting is not removed when you move the cursor, you must explicitly cancel unwanted highlighted blocks.
- Disable
- Block highlighting is removed when you move the cursor, similar to most programs.
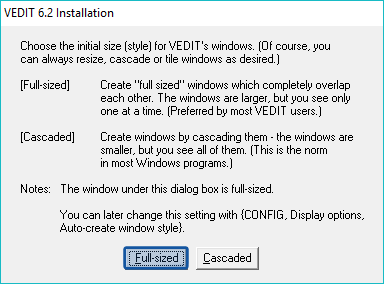
22. Select initial size (style) for vEdit's windows.
- Full-Sized
- Create "full sized" windows which completely overlap each other. The windows are larger, but you can only see one at a time.
- Cascaded
- Create windows by cascading them. The windows are smaller, but you can see of them at once.
This can also be changed later in your display options, we selected Full-Sized for the guide.
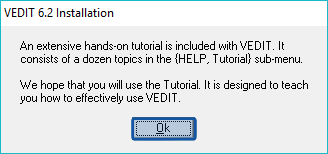
23. Prompt over tutorials, click ok
24. Information over vEdit's startup, click Ok.

25. Information over the vEdit version you have installed, click Ok

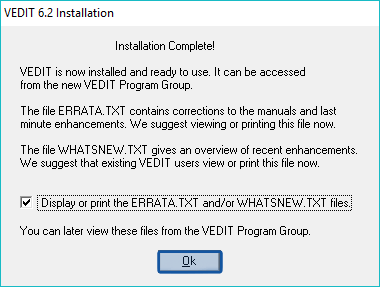
26. Installation is now complete! Click Ok.
27. Click Exit.

28. Now vEdit should be installed in the location you selected on your flash drive, to test this open the folder and run vpw.exe or vpw64.exe.
USB Drive vEdit Desktop Shortcut
For ease of use, you can set a desktop shortcut on Windows computers you will be using your vEdit USB drive on commonly.
This method works for Windows XP, Windows Vista, Windows 7, Windows 8 (8.1), and Windows 10.
First you have to change your drive letter and then create the shortcut.
Change Drive Letter
When you connect a flash drive to a PC Windows assigns it a drive letter. For a shortcut to work every time we need to tell your PC what drive letter to assign to the USB drive.
1. Connect your USB Drive with vEdit installed to your PC.
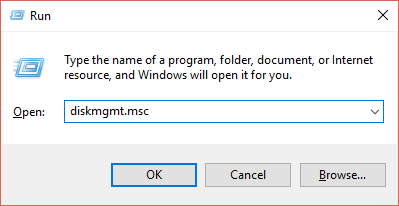
2. With your keyboard, use Windows-R to open Run and type diskmgmt.msc. Click Ok.
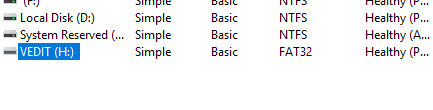
3. This opens your Disk Management window, locate your USB Drive.
4. Right click your USB drive volume and click Change Drive Letter and Paths.
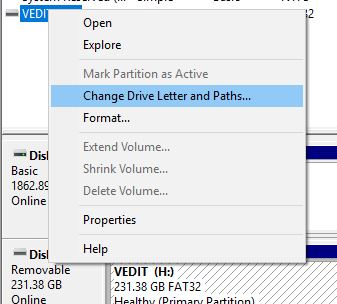
5. Click Change...
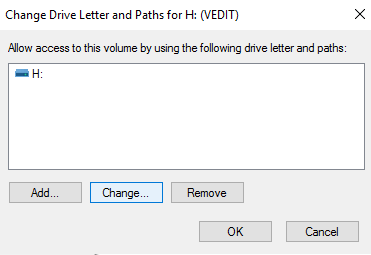
6. Check Assign the following drive letter: and select a letter that you would like. We recommend V , it is low in the letter list and most likely have issues with something else using that letter. Plus V for vEdit, Click Ok once complete.

7. Anything open will refresh with your new drive letter.
Create the Shortcut
1. On your desktop, right click and select New then Shortcut.
2. Create Shortcut, select Browse....

3. Browse to you vEdit install folder and select your .exe file you wish the shortcut to execute. Once complete click OK.

4. Click Next to continue and then Finish. Your vEdit shortcut has now been created.
Additional Options
An additional option we would recommend is to rename the Drive Volume. This will make it easier to see when looking for the drive in a list.
To change the volume name:
- Go to your Devices and drives via Start then This PC or My Computer.
- Right click your USB Drive and select Rename.
- You can rename the drive to anything you would like, ex. vEdit, then click the enter key.